Home » How to Send Confirmation Email with Elementor
Elementor forms are a crucial component of the popular Elementor page builder plugin for WordPress. These forms empower users to create custom contact forms, registration forms, surveys, and more, all without the need for any coding knowledge.
So, why do you need how to send confirmation email with Elementor?
Confirmation emails play a vital role in communication with your website visitors. They provide confirmation of form submissions, reassure users that their message has been received, and can even include important details or next steps. By mastering the art of sending confirmation emails with Elementor, you can enhance user experience, improve communication, and streamline your workflow.
Let's Get Started
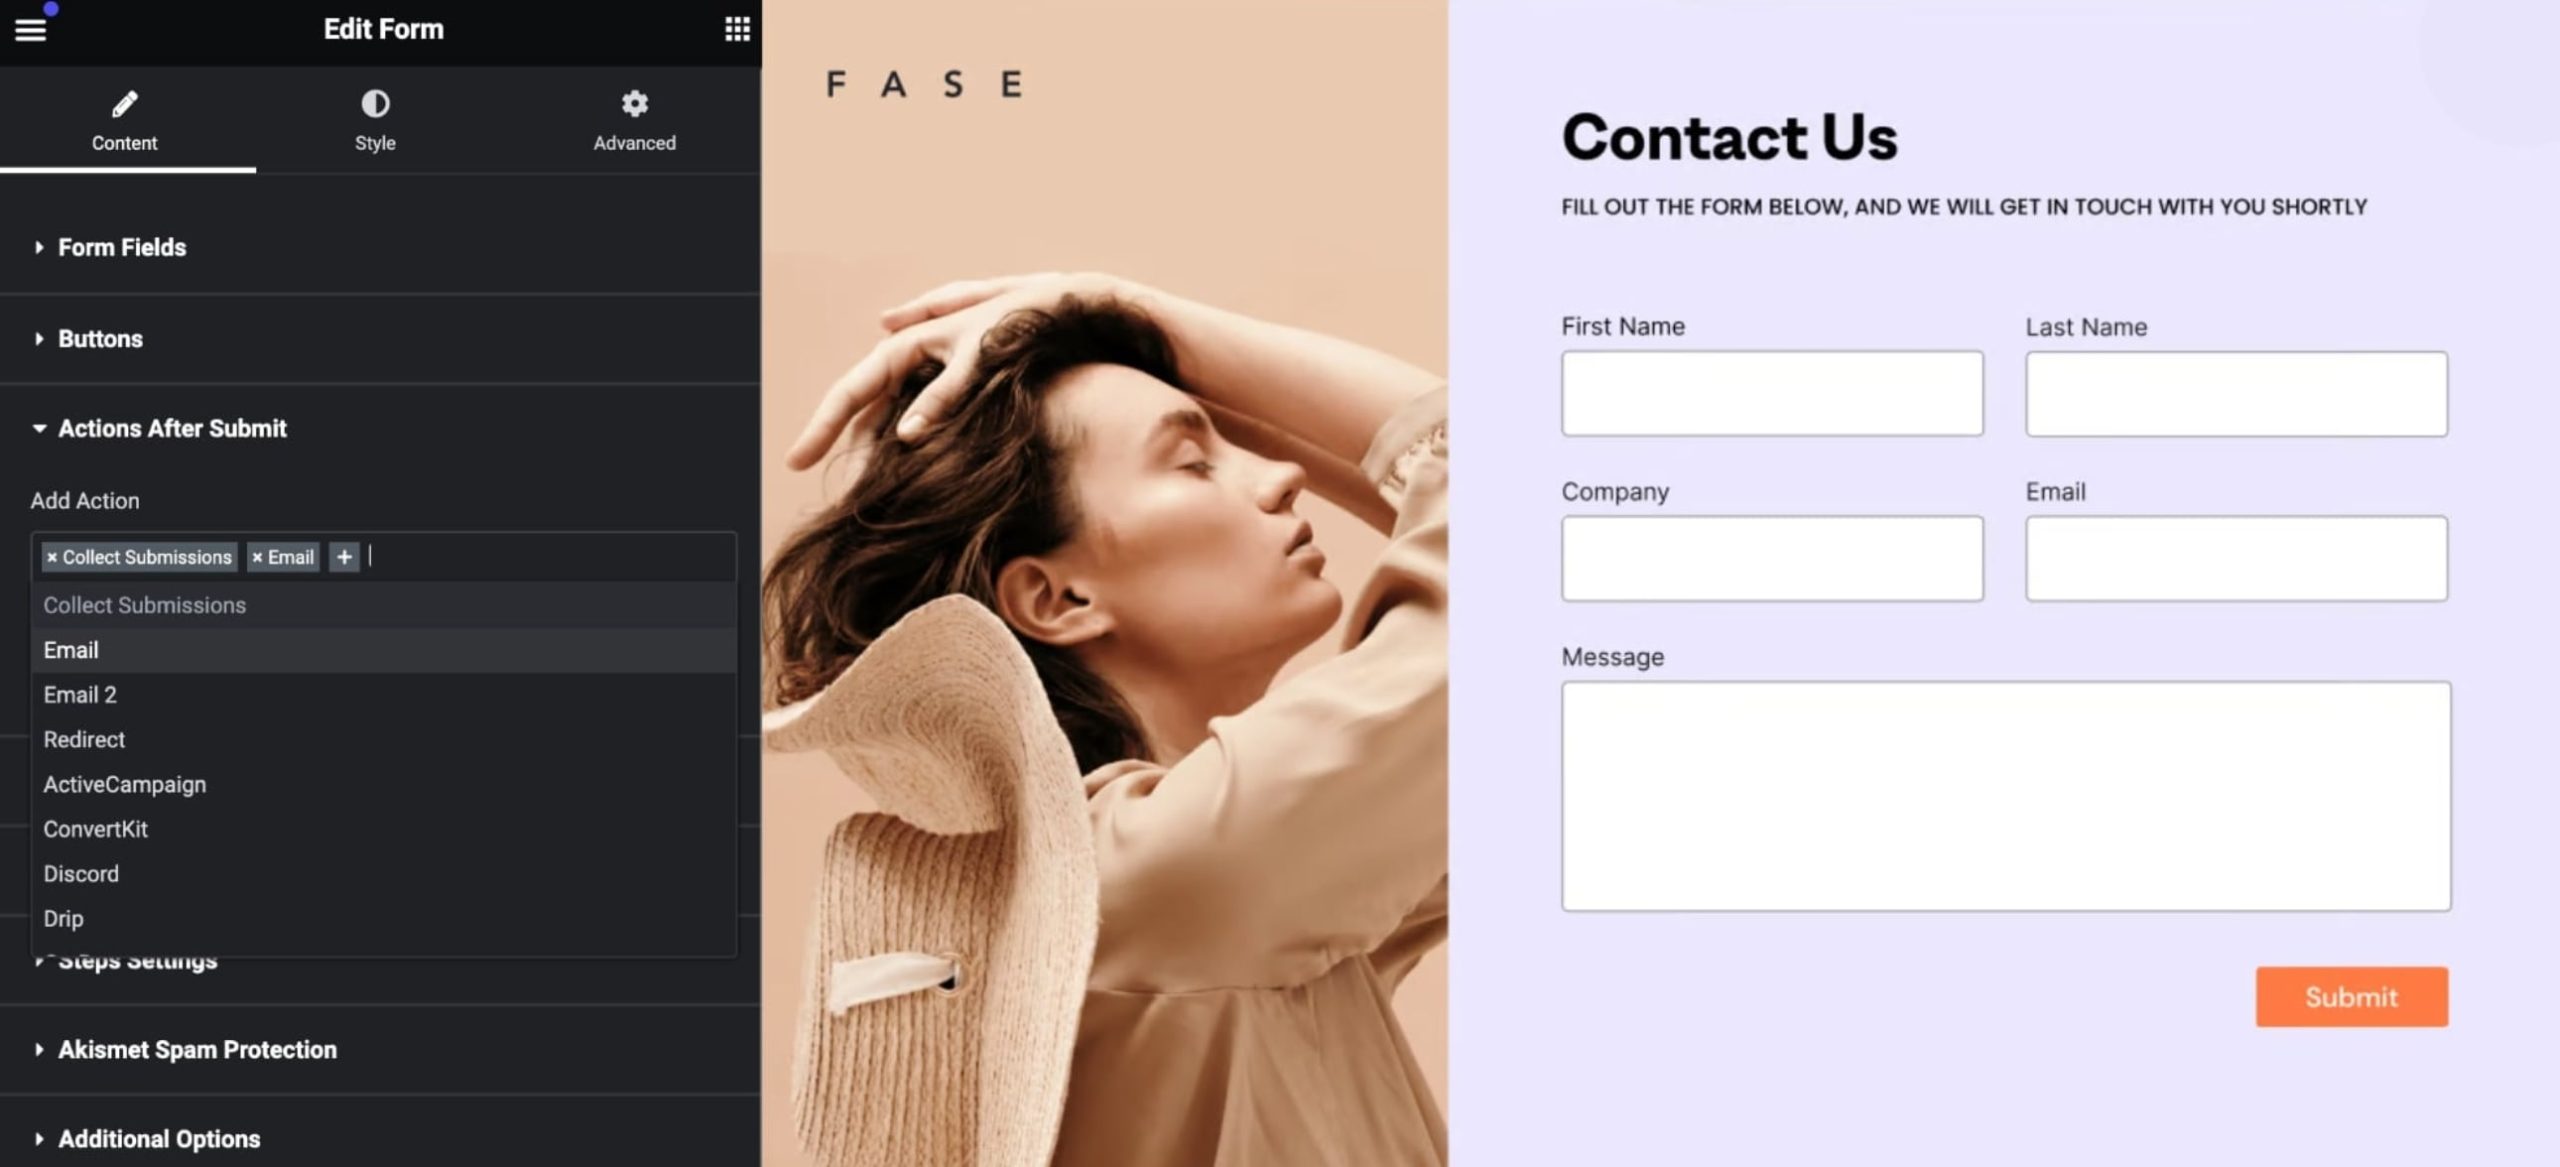
First of all you need to insert the "Widget Form" into the page then go to 'Actions After Submit,' click on 'Add Action,' and select 'Email'."
Below are the settings you will find in the "Email" tab:
To: Specify the recipient's email address. By default, it's populated with the email address set in the WordPress admin.
Email Subject: Enter the subject line for the email.
Email Content: By default, all form fields are included via Shortcode: [all-fields]. To customize the content, use Shortcodes for individual fields (e.g., [field id="name"]). Shortcodes can be found under Form Fields > Email (or other form fields) > Advanced. Alternatively, you can create a custom email using HTML. Refer to the example provided at the end of this article.
From Email: Input the sender's email address.
From Name: Enter the sender's name.
Reply-To: Specify the email address for replies. This content mirrors the From Email field.
Cc: Add recipients for carbon copies.
Bcc: Add recipients for blind carbon copies.
Meta Data: Include additional metadata in the sent email, such as Date, Time, and Page URL.
Send as: Choose between sending the email as HTML or Plain Text.
Reply-To: Specify the email address for replies. This content mirrors the From Email field.
Configure Email2
Email2 serves a vital purpose. For instance, it might serve as a confirmation email sent to your website visitor immediately after they submit a form on your site.
To set up Email2, simply follow the same steps outlined above for Email.
In the 'To' field, you'll need to insert the shortcode found in the advanced tab of the email field, like:
[field id="email"].
Enhance the personal touch of the confirmation email by incorporating the submitter's first name, such as :
We use cookies on our website to give you the best experience by remembering your preferences and repeat visits. By clicking “Accept”, you consent to the use of ALL the cookies.